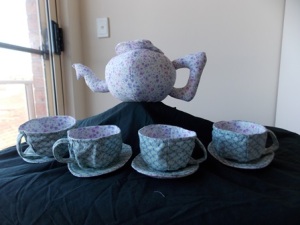
Radiance Tea Set

I finished my tea set. I hand painted all my fabrics using Liquid Radiance. I used various techniques to create patterns and prints on the fabrics.  This has to be the most planned out tea set I’ve ever made. Once again I used the pattern I used was Ric Rac’s Tea Set. It is a great pattern.

LR Tea Set Cup Outside

On the cups for the outside fabric I used the piece of I created via heliography. The stars are randomly placed on each panel of the tea cup. I could have fussy cut the pieces if I wanted to but instead I just folded the fabric in half right sides together and pinned my pattern pieces so I was cutting 2 pieces at once. What each panel got on then became random. When piecing the cups together I tried to get a variety of star coverage so one cup didn’t end up with heaps and another with very little.

LR Tea Set Cup Inside

On the inside of each up I used the pole wrapped fabric. Each cup has one darker piece in it and the rest light fabrics which were the various layers of the fabric wrapped around the pole. For the inside bases of the cups I used the spotted fabric I created by heliography and air exclusion. I did 2 pink and 2 purple.

LR Tea Set Cup Bottoms


On the handles and the bases for all the items (plates, cups, teapot) I used the stripped fabric I created by folding the fabric. My original plan was always to use this for the handles but by chance I got all the bases done from it too which ties all the pieces together.

LR Tea Set Plates Top

I also used the spotted pieces as the centre of the plates again 2 pink 2 purple. For the top side of the plates I used some of the fabric I salted to create patterns. Again keeping with the them I did 2 pink 2 purple.

LR Tea Set Plates Bottoms
For the bottom of the plates I used the more of the salted fabric but alternated the colours so the plates would end up with both a pink side and a purple side.

LR Tea Set Teapot

The teapot lid is made from the mop up fabric piece I had. On the spout, handle and main section I used the 2 fabrics which I created using the scrunch and fold technique. Each piece of fabric had different colours and marble lines through it so I alternated the pieces on the main section. The spout and handle have one piece of each fabric on them.

Sadly I forgot to take a picture of them all together but as you can see they all match and make a lovely set. They are mostly all the same tones pink and purples but the different amount that of paint I put on each piece and the other colours which I added to it slightly changed the appearance on each piece of fabric. I loved trying out the different techniques of heliography, air exclusion, salting that created the different patterns and textures on the fabric.

LR Scraps

I have bits of fabric leftover from cutting out the various pieces. I have no idea what I will use it for yet. I’m finding it hard to let go of these scraps as I made them.

Cassiy

Scrappy Teaset

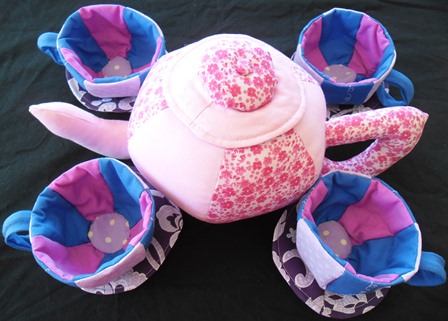
Yes, I’ve made another Teaset. I can’t help it!! I love the pattern so much and I just want to make it for every family that I know who have little girls. I am now up to Teaset number 4, and counting…

Scrap Tea Set

In making this Teaset I decided to set myself a craft challenge, only use fabric from my scrap stash. I have many boxes of small scraps that I’ve used in my gifts over the years. All the fabric had to be found amongst the stash. It meant that I really put thought into each piece and shape. I also had to work out which colours would go together in the small segments.

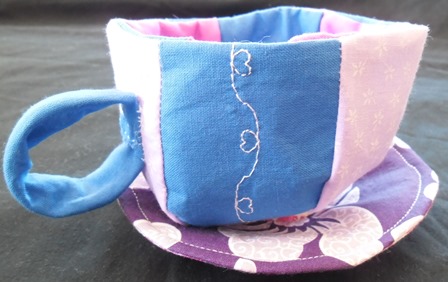
Scrap Tea Cup

In making the cups I decided to put the sewing skills I learnt in the sewing class to good use and stitched a design on the outer plain panels. I’m really happy with how it looks because even though it’s the same fabric as the handle and the inner cup, the stitching makes it look different. A simple bit of stitching makes plain fabric look fancy.

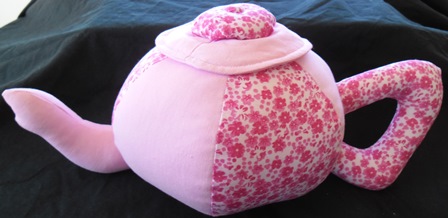
Scrap Tea Pot

This is also the first time that I have used multi-coloured pieces on the cups and the teapot. I had to calculate out the number of pieces I cut and make sure I stitched them in the right order so to form the pattern.

I did make a small dent in my stash with this project, not that you can really tell. I like setting little personal challenges like this for myself. I’m going to take this teaset with me to Urban Stitches this year for show and tell. I’m very proud of it.

High Tea

Another Teaset

Royal Teaset

This one makes me think all royal and posh. Like having tea and cucumber sandwiches with the Queen. This teaset is for another young lady having a birthday this year. In this teaset I’ve done a bit of upcycling. The plain blue fabric is left over from an old donna cover which I’d previously cut up and made dust covers with for fans and heaters in my home. This fabric went nicer with the floral fabric than other fabric I had in my stash. Also the teapot is stuffed using the filling of an old cushion insert I had that has seen better days. I washed and dried the pillow insert before cutting it open. Not only did I make a gift here but I also recycled, was frugal and decluttered all at the same time.

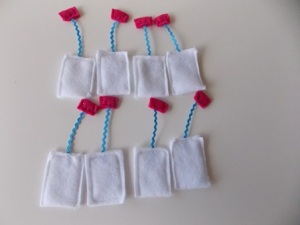
Toy Tea Bags

I thought the tea sets I make need a little something extra to go with them.

??????????

I’ve seen this idea on Pinterest and other sites and thought what a really simple item to make up using scraps.

To make one you will need

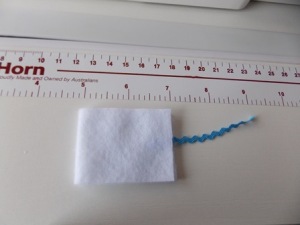
white fabric cut 1.5″ x 4″ (polar fleece, cotton, felt)
coloured fabric for top cut 1″ x 0.75″ (felt is easy to work with)
ric rac 2.5″ (or ribbon)

Fold the white fabric in half so that it is 2″ tall

Tea Bag Start
Place your ric rac between the layers at the top of the tea bag

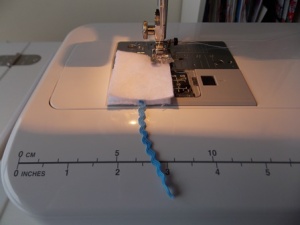
Machine stitch around all 3 sides of the tea bag. Back stitch over the ric rac to ensure that it is stitched in

Tea Bag Stitch

Fold your tea bag top in half and place over the end of the ric rac. Hand stitch around all 3 sides again back stitching over the ric rac to ensure its secure.

Now you have a tea bag.

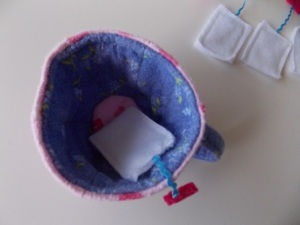
Tea Cup

I’ve seen these made where people have stuffed the inside with fibre fill or rice. I’ve also seen people stitch the 2 long sides of the tea bag like a toy and turn them inside out to hide the seems before sewing the top. These are great ideas but not really me. I like it plain and simple. These could easily be all hand stitched if you wanted a simple tv stitching project.

Green Tea

I’ve made a second tea set.

Green Tea

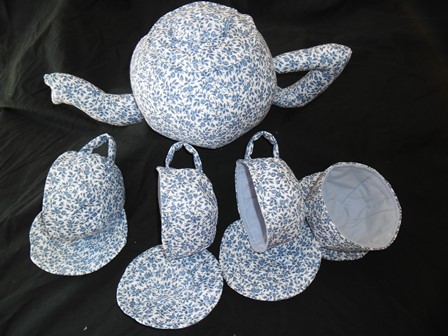
This is the same pattern I used in Nanna Sukies Tea Set This time it is made all in cotton. I opted to only use 2 colours so that it would actually look like an old English tea set. The white fabric was screaming out tea pot to me. The white cotton was very fine so in some parts I’ve had to double the fabric or line it with stabilizer for it to hold the shape.

This tea set will be given to a different child so I wanted it to have its own look and feel.

Nanna Sukie’s Tea Set

Recently I attended a lovely weekend at Urban Stitches with the talented designers Rosalie Quinlan (Rosalie Quinlan Designs) Jodie Carleton (Ric Rac) and Melanie McNeice (Melly & Me) I had a great weekend and made some lovely new friends. I purchased Jodie’s pattern “Tea-Set” and knew I had to make it.

Nanna Sukie's Tea Set

Nanna Sukie’s Tea Set is for my 3 year old nieces as a birthday gift made from my mum’s old pyjamas. Mum was known for loving her pj’s and when she died I kept them vowing to make something with them for my nieces.

I didn’t quite follow the pattern to the word. I constructed the teapot and teacups a little different to the instructions and I haven’t put buttons on the teacup handles. I couldn’t get hold of template plastic so I used flexible plastic canvas I had as the bases and as it was a bit thick used interfacing in the cup lining bases instead of the plastic. I used a large yo-yo maker to make the lid toppper and put the plastic in once I stuffed it and then attached a self covered button as the teapot lid. I added an extra 2 teacups and saucers as it was more practical for the kids I’m giving it too. I really enjoyed making it. It gave me a chance to work with interfacing and rigilene for the first time. I’ve noted the things I’ve done different and have put them with the pattern so when I make it next time I can do it the same way. I love this design so much I plan to make another 2 versions of it later this year for other kids.