I loved the look of the Tiny Essentials Tote by Little Moo Designs the moment I first saw it. I don’t say it often with bags but it just looked cute. The Australian Sewing Guild held a sewalong to make it at the start of December but unfortunately I didn’t have the time to participate in it so on December 31st when I had a few days up my sleeve I started on it.
The bag looked challenging and involved a lot of techniques and material which I had never tried or worked with before. I’d never made piping, used fold over elastic or worked with netting or webbing. I wasn’t scared by this new things and actually wanted to get in there and have a go with them. The tutorial that comes with the pattern is great and as part of the sewalong the Guild put additional notes and tips up on their blog which came in handy.
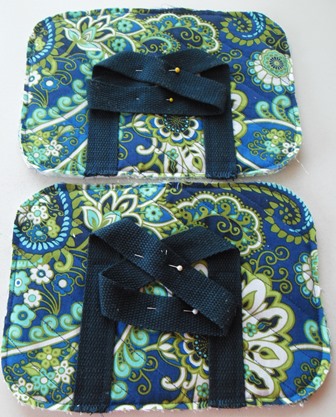
Throughout the entire pattern suggestions are given on how to make the bag to your personal taste. I kept the outside of the bag simple using one fabric, quilting it with diagonal lines and using plain webbing for the handles. If you wanted to you could piece the front, add fabric detail to the handles and quilt it as elaborate as you wanted.
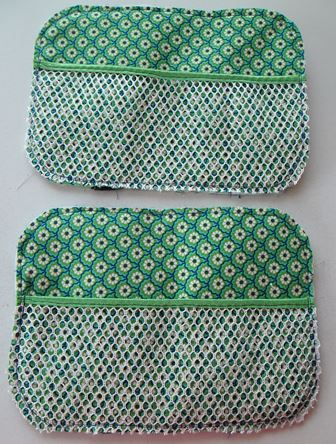
On the interior pieces you really have the opportunity to customise the bag to the way you wish to use it. I opted to have 2 netting pockets but the tutorial shows you many other options including using elastic straps so you can hold items in place. I thought the netting would be flimsy but this netting is really thick and solid. Sewing it was very easy.
I used fold over elastic (FOE) to cover the raw edges. Having not used FOE before I had no idea how to sew it. To be honest until it arrived in the mail I didn’t even know it was sold flat I thought it was folded like premade bias tape. I looked on YouTube on how to sew it and happen to find this clip by Anne who is a fellow Guild member, she has some really good tips. To sew the FOE I decided to first secure it with a zig zag stitch. I had it set to a standard width but perhaps I could have made it a little narrower. After folding the elastic over I did a straight stitch to hold it in place. I wasn’t sure how much FOE to use so the pocket would gather a little. I used 9″ but perhaps could have use 8 3/4″ or 8.5″ to really pull it in. For the first attempt at FOE and netting I’m happy with it.
When it came to making the zipper I had no issues. In 2015 I sewed a lot of zippers so I don’t have a zip phobia. I actually sewed all 3 layers in one hit like the tutorial suggests. I took my time, went slow and at the end remembered to take the zipper foot off (I broke a needle last year when I forgot this) I even pattern matched both sides of the zipper! I’m proud of my zipper.
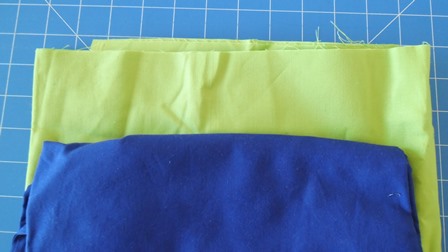
One thing I didn’t do when making this was cut out all my pieces before I started. Yes I should’ve but I felt it was a little time consuming and I just wanted to get in and sew. When it came to stage of making the continuous bias strips for the piping and the binding I discovered I didn’t have enough fabric left to cut my squares… Oops. The irony was in the afternoon prior to making the strips I had been in a fabric store. That’s ok I adapted and raided my stash. I knew I had navy fabric but by chance just as I approached my stash I saw the green fabric through one of the clear boxes I keep my stash in. It was perfect.
Another place where I adapted my fabric was on the back piece of the gusset. I needed only 1 rectangle I think about 6.5″ x 5″ I didn’t want to cut an entire strip off my remainding fabric for only 1 piece yet I didn’t have a piece big enough from the scraps for it so I stitched 2 scraps together to make the size I needed. It was perfect and used up some of the leftover bits.
When I assembled the bag I did have couple of little flaws. In the gusset area there are a few small folds. I just need to remember next time to go a bit slower and ensure both layers are flat. You can also see some of my original stitch lines on the inside of the bag when I secured the netting to the bag or stitch both panels of the bag together. Next time I need to just do these lines of stitching closer to the edge. Also my binding strips look a little bulky so I maybe next time I will cut them a little narrower. I stitched all the binding on by hand first tacking it on one side with a running stitch and jeans sewing needle then switching to a regular needle to slip stitch the folded strip in place. I haven’t decided if I like piping or not. My piping on this bag isn’t too bad for a first attempt. I may of stitched a little close to the cord to enclose it so when it came to securing it to the bag in places you can see my original stitching line as it didn’t get hidden in the seam. I just need to leave more of a gap. It was fairly easy to do so I will attempt it again.
I am extremely happy with this bag. The fabrics I used were from the July Sew Box and of course the contrasting fabrics were from my stash making this a real Sew My Stash project. When I got these fabrics in July I knew I wanted to make something for me with them as they are very much my colours of choice. The sewalong was hosted by the Australian Sewing Guild and I’m going to use this bag to take to Guild meetings so I have that little connection between the 2. I got to challenge myself with this bag and experiment with new techniques and materials. One of the reasons I joined the Guild was to expand my sewing skills and this bag sums it up.
I finished this bag on Jan 3, what a great first completed project to start off the year.
Cassiy


I love the fabric that you used! Everybody needs a good tote and this one looks super sturdy!
Thank you the fabric is fantastic isn’t it 🙂 I’m so glad I used it on this bag. You are right it is so sturdy and fits so much in it.
Well done, looks great
Thanks Denise, I’m very proud of it.